When I'm building web projects, I always make sure to test them on real mobile devices to ensure the best user experience. In this guide, I'll show you exactly how I access my laptop’s localhost development server from my mobile phone, whether I’m on a shared Wi-Fi network or using my laptop as a hotspot.
Why Access Localhost on Mobile?
- Test Responsiveness: See how your site looks and behaves on actual mobile screens.
- Debug Mobile Issues: Catch bugs and UI quirks that only appear on mobile browsers.
- Share with Others: Easily share your work-in-progress with colleagues or clients for instant feedback—no deployment needed.
Step 1: Connect Both Devices to the Same Network or Hotspot
To begin, ensure your laptop and mobile phone are connected to the same network:
- Using a Shared Wi-Fi:
Connect both devices to your home or office Wi-Fi. - Using Your Laptop as a Hotspot:
- Windows:
Go toSettings > Network & Internet > Mobile hotspotand turn it on. - Mac:
Go toSystem Preferences > Sharing > Internet Sharingand enable sharing via Wi-Fi.
- Windows:
Once enabled, connect your phone to the hotspot created by your laptop.
Step 2: Find Your Laptop’s Local IP Address
You’ll need your laptop’s local IP address to access it from your phone:
- Windows:
- Press
Win + R, typecmd, and press Enter. - In the Command Prompt, type
ipconfig. - Find the “IPv4 Address” under your active network adapter.
- Press
- Mac:
- Open
System Preferences > Network. - Select your active connection (Wi-Fi or hotspot).
- Note the “IP Address”.
- Open
- Linux:
- Open a terminal.
- Type
hostname -Iorifconfig. - Note the IP address.
Step 3: Start Your Local Development Server
Run your local web server as usual. Common commands include:
- Node.js/Next.js:
npm run dev
or
next dev
- Python:
python -m http.server 8000
- Other frameworks:
Use the appropriate command for your setup.
Make a note of the port number your server is running on (e.g., 3000, 8000, etc.).
Step 4: Configure Your Server to Listen on All Interfaces
By default, most development servers only listen on localhost (127.0.0.1), which means they won’t be accessible from other devices. To allow access from your mobile phone, you need to make your server listen on all network interfaces:
- Next.js/Node.js:
next dev --host 0.0.0.0 --port 3000
or
npm run dev -- --host 0.0.0.0 --port 3000
- Python:
python -m http.server 8000 --bind 0.0.0.0
- Other frameworks:
Check your documentation for how to bind to all interfaces.
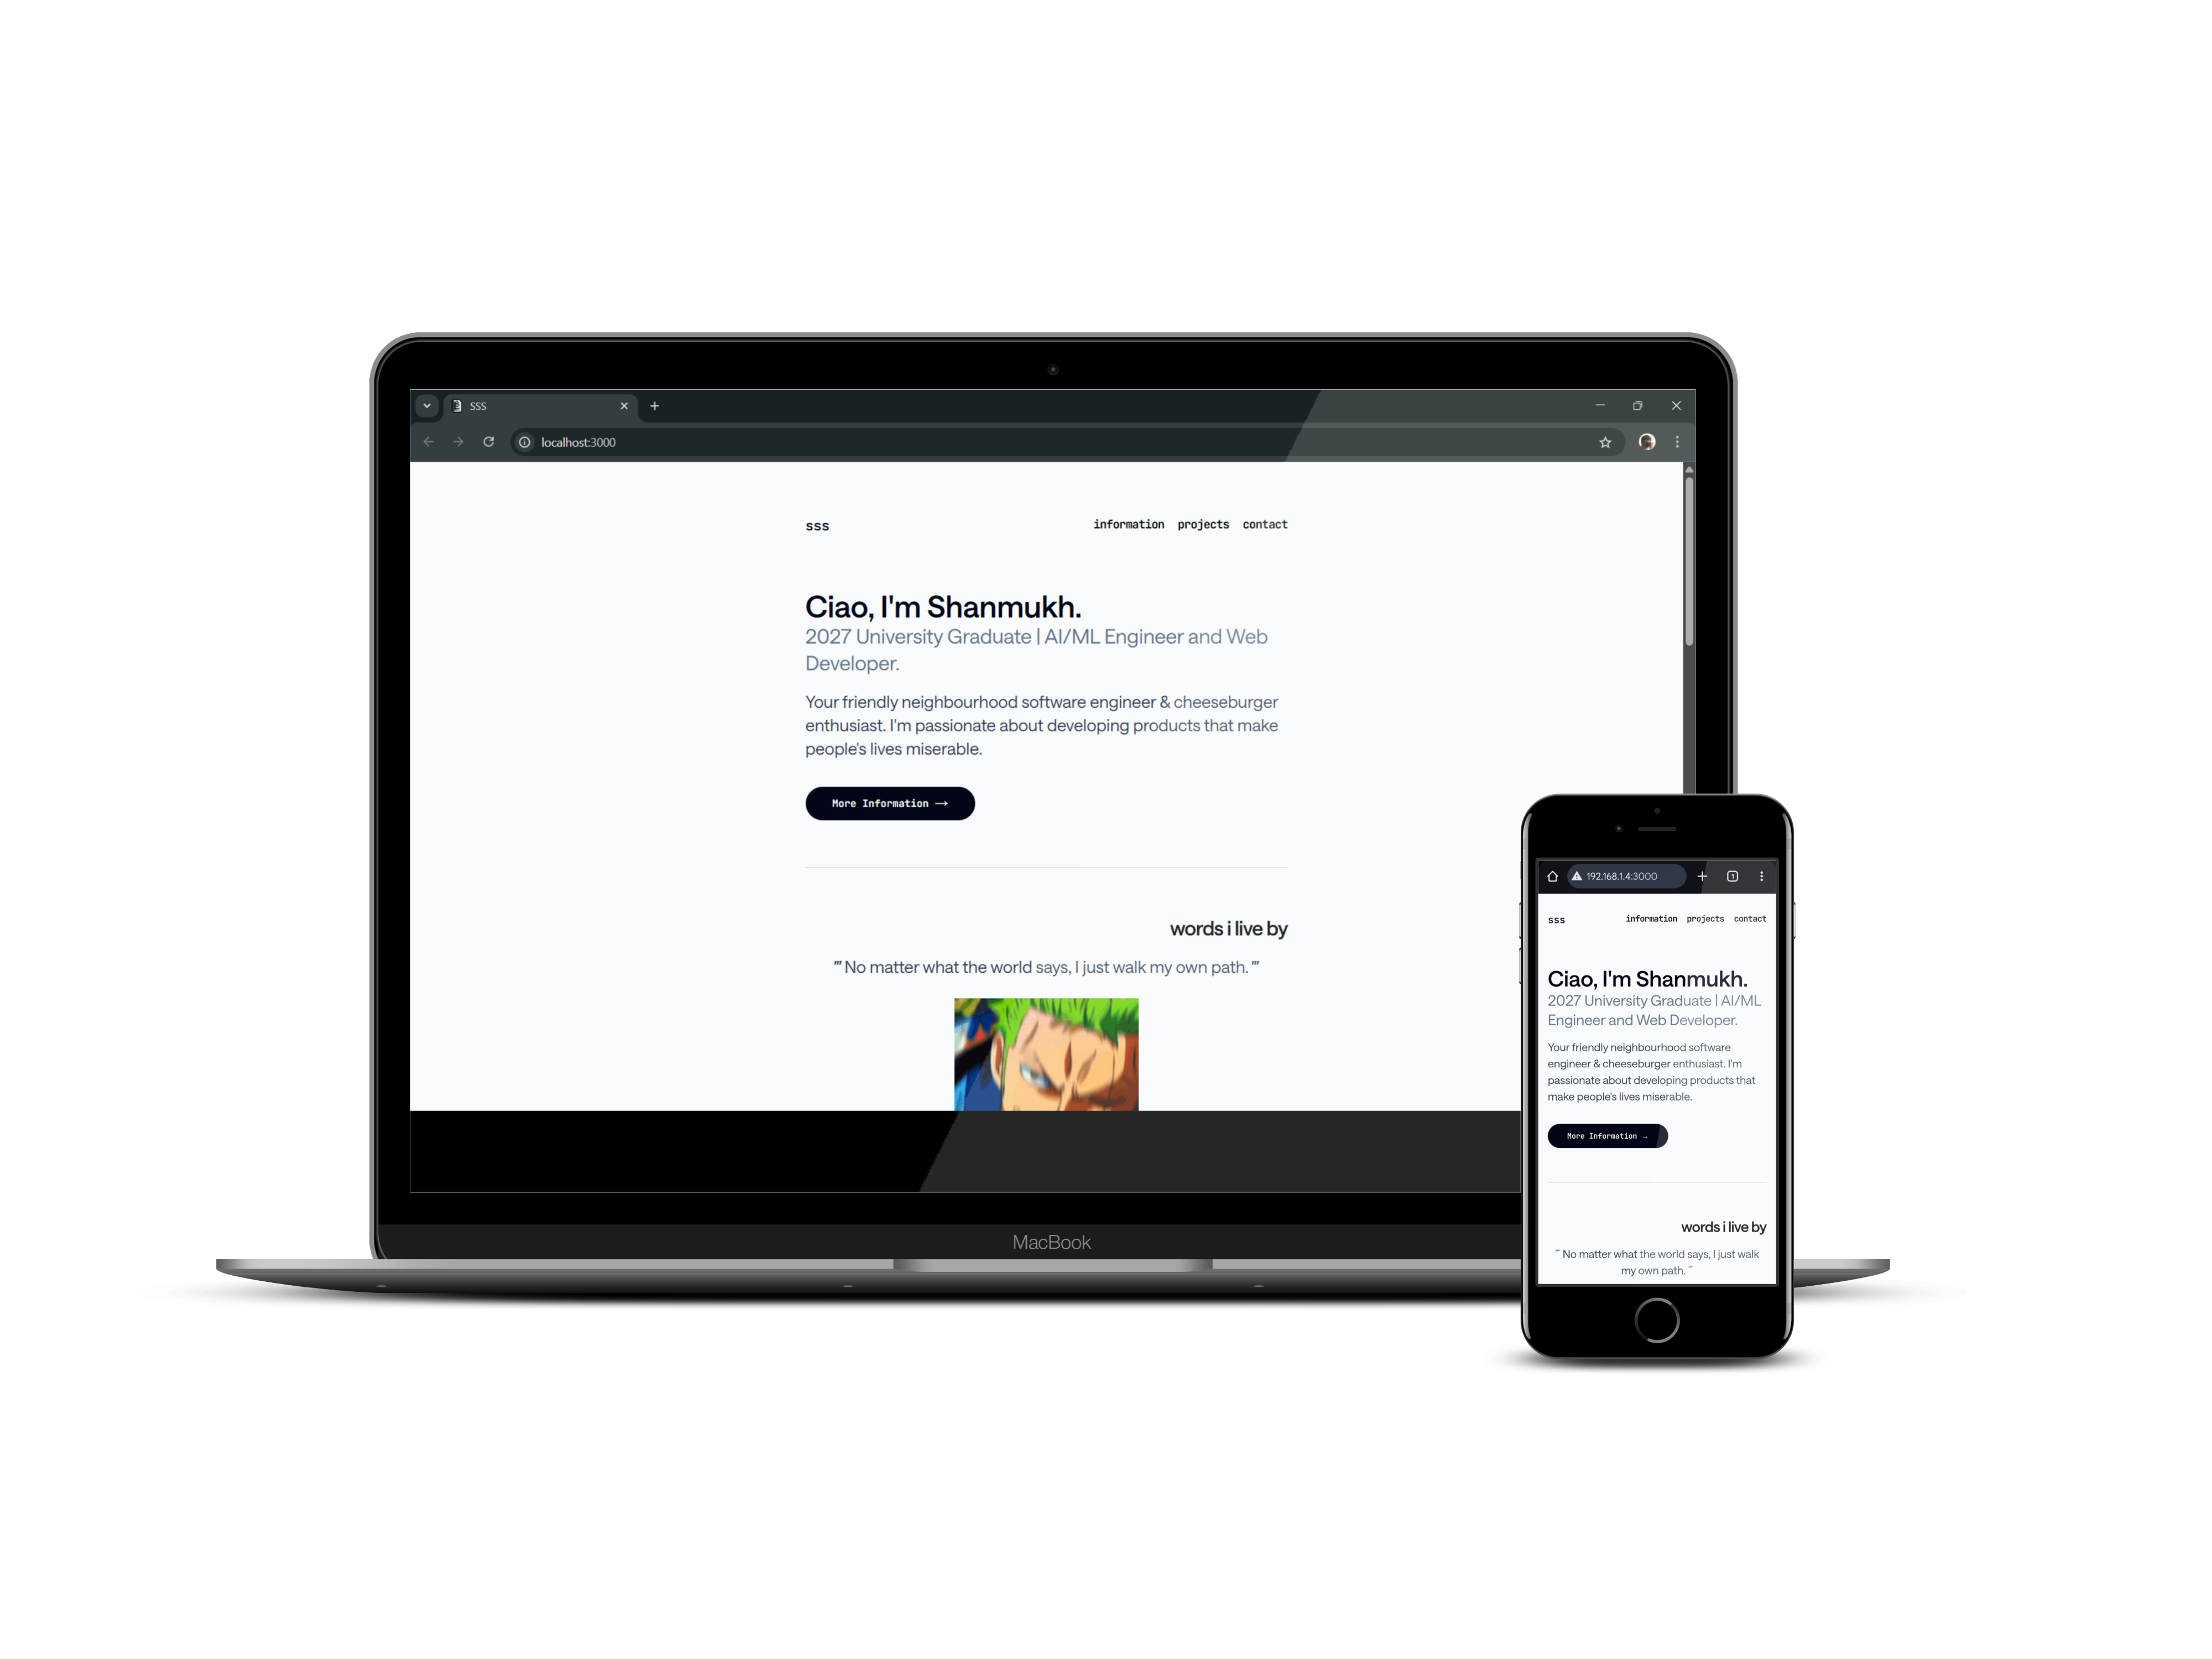
Step 5: Access Your Localhost from Your Mobile Browser
Open your mobile phone’s web browser and enter the following address:
http://YOUR_LAPTOP_IP:PORT
Replace YOUR_LAPTOP_IP with the IP address you found in Step 2, and PORT with your server’s port (e.g., http://192.168.1.100:3000).
You should now see your web app running on your phone!
Troubleshooting Tips
- Firewall Issues:
Windows Firewall or your antivirus may block incoming connections.
Solution:
Allow the server port in Windows Defender Firewall or your security software. - Server Not Accessible:
Make sure your server is running and listening on0.0.0.0. - Wrong IP Address:
Double-check that you’re using the correct IP address for your active network. - Network Issues:
Ensure both devices are on the same network or hotspot.
Advanced: Accessing Localhost from Anywhere
If you want to share your localhost with people outside your local network, consider using these tools:
- ngrok:
Creates a public URL that tunnels to your localhost. - localtunnel:
Another simple tunnel for localhost exposure. - VS Code Remote – Tunnels:
Built-in port forwarding in VS Code for secure remote access.
Conclusion
By following these steps, you can easily test and debug your web projects in real-world conditions, making sure to deliver a polished experience for every user.